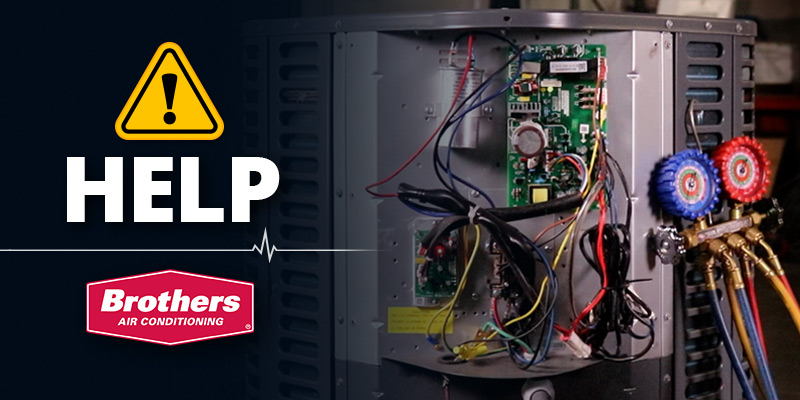
HVAC Overflow Shut-off Switch
When the air conditioner is running often and working hard in the hot summer months, a minute to check that the float switch is functioning could prevent a lot of trouble down the road.
“When was the float switch last checked?”
That’s a very important question to answer, especially when air conditioners are running often and running hard.
So… what’s a float switch?
In an air handler, the condensate drain line is designed to take moisture caught by the drain pan and carry it away from the system. When this line becomes clogged, water cannot discharge freely, causing the drain pan to overflow. Since producing condensation is a natural part of the A/C system’s operation, the water will keep overflowing the pan until the system is shut off.
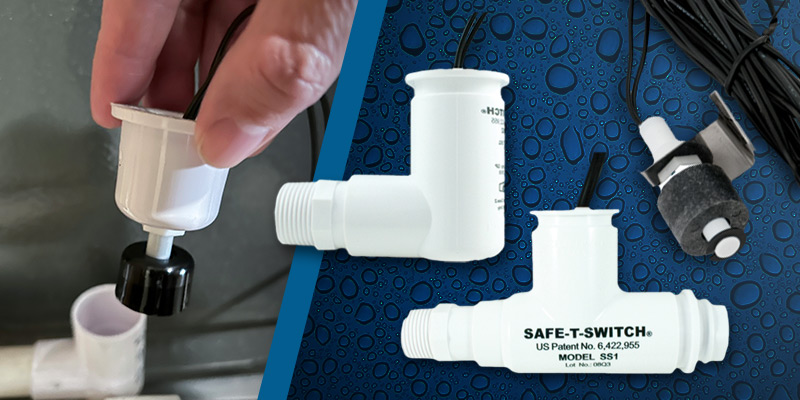
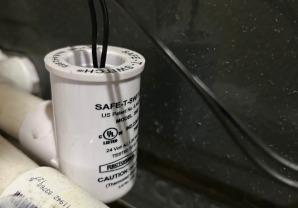
The Overflow Shut-Off, “float switch,” or “Safe-T-Switch” is designed to stop water damage before it happens. If water is backed up in the line, the switch trips, shutting off the system. No more water is produced, and the system will not operate until the clog is cleared and the pan is drained.
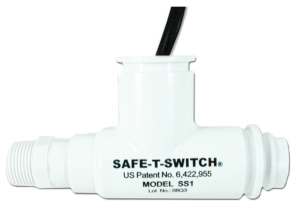
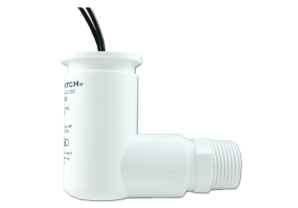
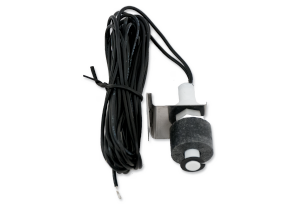
Float switches come in three different styles. They may be installed in the drain line as a pass through (SS-1), in an elbow fitting on the secondary drain line port (SS-2), or clipped to the secondary (emergency) drain pan (SS-3).

Testing the Overflow Shut-Off
To test the Overflow Shut-Off switch, first determine which switch it is.
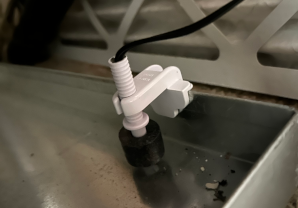
This SS-2 Safe-T-Switch is attached to the secondary drain line port near the main drain line.
This SS-3 Overflow Shut-Off is attached to the secondary (emergency) drain pain.
CAUTION: Overflow Shut-Off switches should NOT be glued to the fitting.
To test a switch that is installed in a “T” or “elbow” fitting (see SS-2, above), CAREFULLY lift the switch up out of the fitting. The switch should slide out easily.
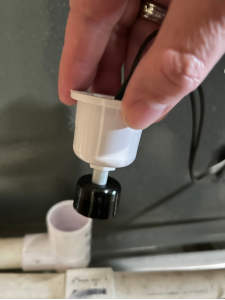
- After removing the switch from the fitting, gently slide the black float piece up the rod toward the switch housing.
- Hold for about 30 seconds. The system will shut off.
- Release the float.
- Reinstall the switch in the fitting.
- Listen to make sure the system comes back on. This may take a few minutes.
To test the drain pan switch (see SS-3, above), gently push the float up. You will hear the system shut off. Release the float. Listen to make sure the system turns back on.
If the float in either switch is pushed up but does not shut off the system, that switch may be bad or going bad. It’s time to replace the Safe-T-Switch.
If the switch is working and the drain line is backing up or appears clogged, refer to this easy How-To guide to clearing a clogged HVAC drain line.