Weatherstripping Tips
Take care of weak, leaky seals around doors and windows this winter to save energy and avoid unnecessary service requests with these expert tips.
Tips from M-D Building Products
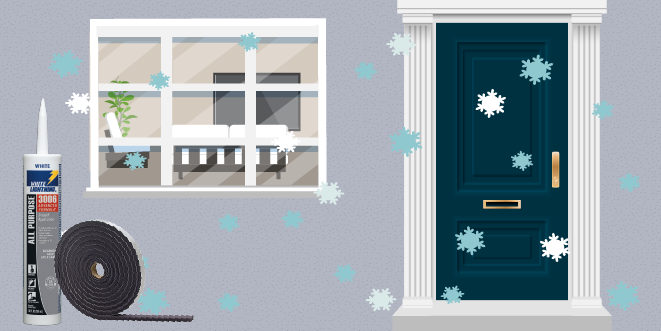
Weak seals around doors and windows can let more than air escape. Leaky openings in your units and buildings drive up energy costs and increase time spent on related service requests due to heating and cooling issues. In addition, there could be mold and other issues that come up as a result of insufficient caulk and weatherstripping.
One of the quickest energy-saving and preventive measures multifamily properties can do is seal all seams, cracks, and openings to the outside of each apartment home. Before cold weather sets in, caulk should be used to seal stationary components and weatherstrip applied to all moving parts of doors and windows.
Determine What Type
There are 4 main types of weatherstripping, and a good way to know what you need is to look at what was previously installed. If there was nothing previously in place, then look for one that meets the needs of the application.
- V-Flex or Tension Seal – is a durable plastic or metal strip folded into a ‘V’ shape that springs open to bridge gaps. Where to apply: along the sides of double-hung or sliding windows; on the top and sides of doors.
- Foam Tape – made in open or closed-cell foam, EPDM rubber, etc. This type has an adhesive tape on the back for easy application. Where to apply: top and bottom of window sashes; inside door frames.
- Compression - Tubular Rubber, Vinyl, or Silicone – made of tubular sponge rubber, vinyl or silicone material, etc. that is attached to a wood, metal, or magnetic mounting strip. Sometimes these are made to with a kerf edge to be inserted into milled grooves of a door. Where to apply: at the base of doors and windows, top or bottom of window sashes, bottom of doors, between a door and the jamb.
- Door Sweeps – flat pieces of plastic, aluminum or stainless steel that are fitted with a strip of nylon, plastic or vinyl. These are made to fill the space between the door and threshold. Where to apply: along the bottom and inside of doors.
Determine How Much
To determine how much weatherstripping you will need, measure the perimeters of all windows and doors to be weatherstripped. Combine the lengths, then add 5% to 10% to accommodate for waste. Also consider that weatherstripping comes in varying depths and widths, so pay attention to the size of the gap you are trying to seal. Larger gaps will need thicker materials; however, it should not hinder the ability for the door or window to easily shut.
Installation Tips
Weatherstripping supplies and techniques range from simple to technical. The best way to install is to consult the instructions on the weatherstripping package. However, here are a few basic guidelines:
- Apply to clean, dry surfaces in temperatures above 20°F.
- Measure the area to be weatherstripped twice before making a cut.
- Apply weatherstripping snugly against both surfaces.
- Once installed, check that the door or window tightly seals by inspecting for light or air movement along the perimeter.
Tips for Doors
- Choose the appropriate door sweeps and thresholds for bottoms of doors.
- Weatherstrip the entire door jamb.
- Apply one continuous strip along each side.
- Make sure the weatherstripping meets tightly at the corners.
- Use a thickness that causes the weatherstripping to compress tightly between the door and the door jamb when the door closes, without making it difficult to shut.
Tips for Windows:
- Apply weatherstripping between the sash and the frame.
- The weatherstripping shouldn’t interfere with the operation of the window.
- If using foam, choose a thickness that stops drafts without making it difficult to shut.
Taking time to weatherstrip, before temperatures drop and heating costs begin to rise, can ensure the most efficient energy use to carry your residents through the coming winter. Similarly, checking for leaks in the spring, before the hottest summer months will detect issues before they become costly and before they could lead to bigger problems later.
Leaky openings will eventually create other work orders and costs—like an over-worked heating/cooling system, mildew due to dampness, or other avoidable issues that could have been prevented by adequate weatherstripping.
Find More M-D Building Products